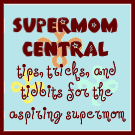
"That little box of HTML that sits under a picture or button, making it possible to copy and paste that same picture along with it's link".
I assume you know how to edit HTML in your blog?
Step one: A test. Goto this site and copy and paste the textarea code. (I change the columns from 50 to 22 to better fit in a sidebar)
- Step Two: Create a photobucket account. It's worth figuring it out, I promise.
- Step Three: Upload a photo/button/whatever to photobucket—make it small for a sidebar pic—125x125 pixels works well. (Photobucket provides you with HTML code for the photo/button/whatever you upload).
- Step Four: Copy the "HTML code" for the photo/button/whatever. (Below the photo in photobucket...starts with: href).
- Step Five: We get tricky here. First paste the HTML code for the button directly into your blog HTML editor(or sidebar html/java box) above the code for the text area box that you already inserted.
You get a button and the text area box below it:

- Step six: Now in the regular viewing editor click on the image itself and link the button to wherever you want it linked.
- Step seven: Back in HTML editor—Copy and paste the button code with it's link into the area of the HTML Textarea code over the top of INSERT HTML MESSAGE HERE.
That was a lot of steps (plus figuring out photobucket etc). Please email me with any questions, I'll try to help. You might want to center the text box? Good Luck!


16 comments:
Thank you for the tutorial. I tried to thank you earlier but my computer froze up.....I can't wait to give this a try.
Carissa, you rock! Thanks for this how-to.
I did it! I did it!
Carissa, we're having problems with my new blog buttons. When people paste the code it's saying the image is no longer there.
Can you help me out? I didn't actually make the code, and I don't really understand all this, but maybe I can pass it along to Danielle, who did make it.
Excellent How-To! Thanks!!
This is excellent thank you! So tonite, I learned how to make a signature as you will see next time you visit my page, now I'm learning these cool little buttons. You Rock girl--whowwwwzaas!
Awesome tutorial! Now I'm off to add my own sidebar button. Thanks!
Oh My Heck! I have been wanting to do this forever!!
SUPER EASY!!!!!!
This was so cool! I can't believe I made my own button! Thanks
Cool, thanks been wondering how to do this!
OMG I made MM her very own bloggy button!!! With the help of your bloggy tute!!!!
Aren't you proud of me !!! I'm excited.
Kaye
THANK YOU! for this tutorial. Who knew it was so easy and I was going to pay someone 25 bucks to make one...argh!
Following your site would love to get your feedback on mine. But be kind I'm a mommy blogger in training :-)
Thank you for this tutorial! I used the signature one as well. Maybe you happen to know this, or could send me a link, but how do you make a button?
thank you! i feel like a super star... i did it... i think- it looks right so i'm assuming it works :)
YAY!! I made one! Thanks for this tutorial!
I could hug you!!!
Thank you, thank you, thank you!!!
Post a Comment